Thursday, September 25, 2008

You've got mail!

Well things have been a bit slow this month - my car trailer is currently being utilised for another purpose and so I havent been able to get my car to the paint shop for engine bay and interior paint. I'm hoping to have it back soon. I'm hanging to get this thing painted so I can start re-assembly! In the meantime my T3 gear arrived today after a bit of a wait, all looks good though! The T3 traction brackets are certainly a hefty bit of gear! I think they may be a little over-engineered, but I'd rather them be bullet proof I suppose then flimsy and prone to breaking or deforming! Downside is the extra weight. You'll also notice a set of power steering arms which I came across on eBay in the states for a lot cheaper than they are available here.

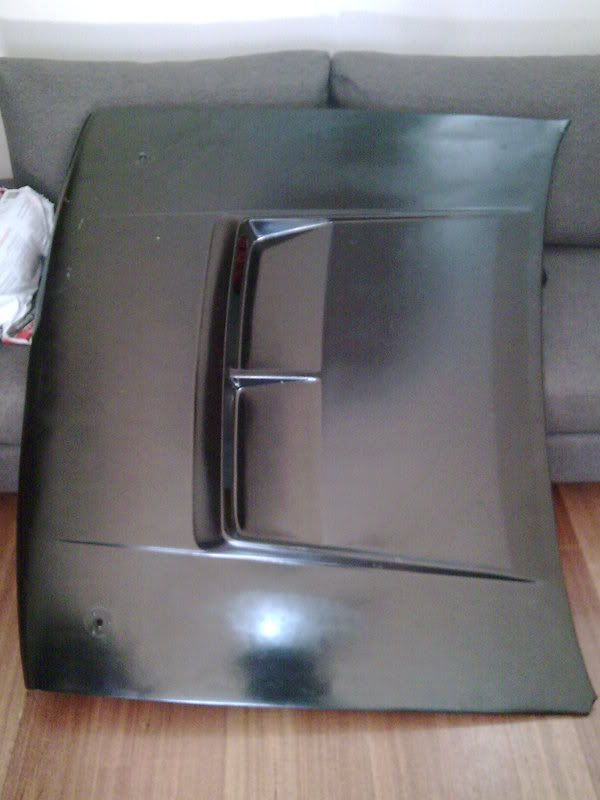
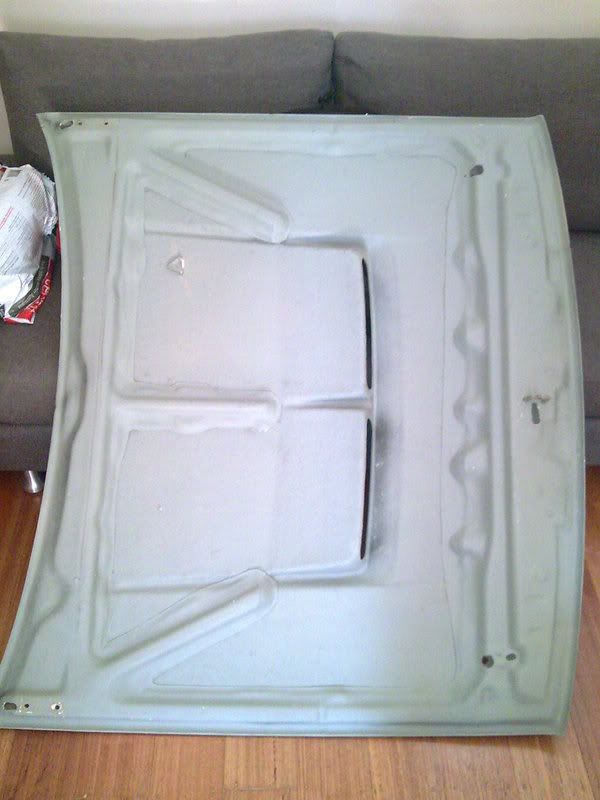
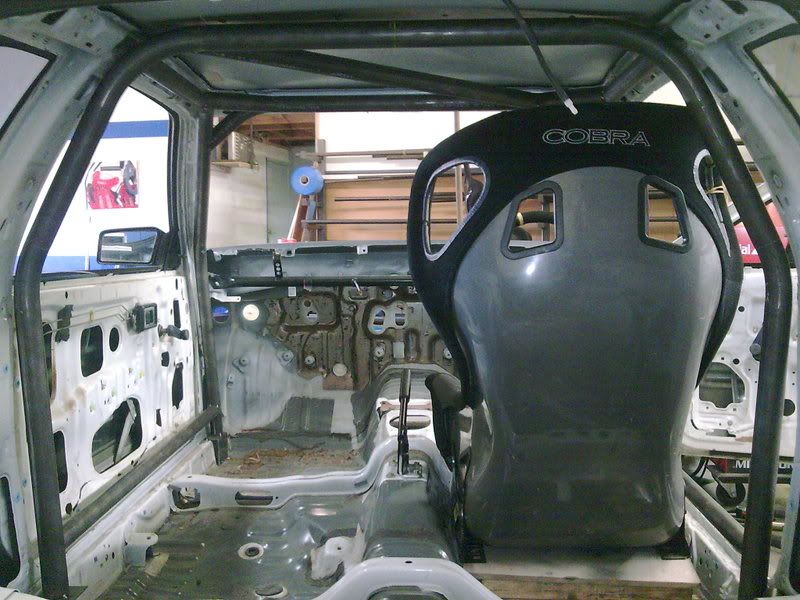
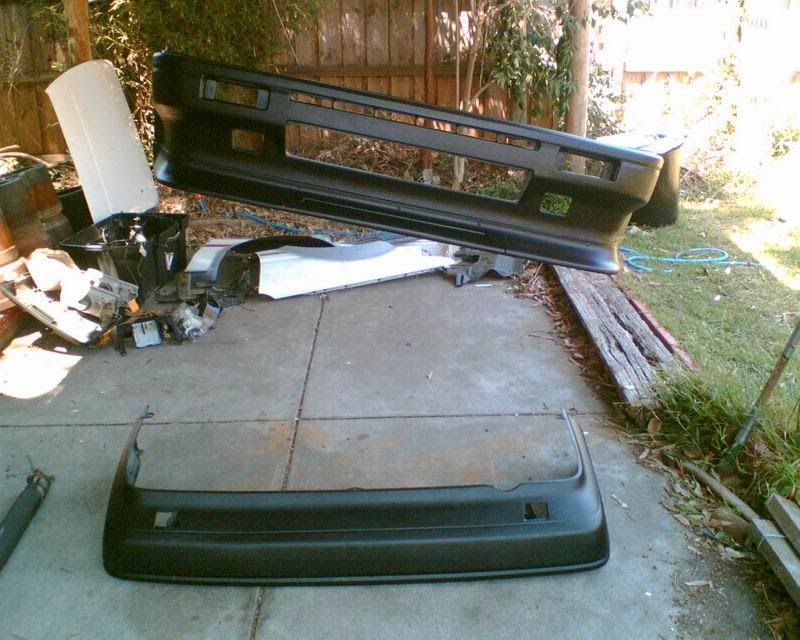
Also today I managed to grab a new lightweight FRP bonnet to replace the heavy OEM one. I wasnt planning on buying one so soon but this one popped up and I was too tempted to not buy it! I think its an authentic Origin bonnet as it appears to be foam filled sandwhich FRP of decent quality and the guy I bought it off also gave me a groovy looking set of bonnet pics that sit flush and lock with a key(cheers
86Powers)! Its 2nd hand and has some slight damage(broken corner) but easily fixed and the price was right! Most importantly its feather light compared to the lead filled OEM one!

Saturday, September 13, 2008

hmmmm oops...


This is not how to fit a new prothane bushing to a lower control arm. If your not already aware the steel sleeve surrounding the old rubber bushing is supposed to stay in the LCA. I gave these to a mechanic buddy of mine to press out and in, thinking he would at least read the instructions first. Oh well, he wasnt charging me so I cant get too angry with him! A few people have contacted me saying they have spares lying around I can have so into the bin with this one and try again...

Thursday, August 21, 2008

Suspension stuff

I was hesitant to add a new entry, seeing that I dont have any new interesting pics of the build to post up. I've basically spent what time I had to work on the car the last two weekends to continue prepping for paint. All welding is now done(I found some more welding to do last weekend), all bare metal surfaces coated in etch primer. I just have to rub back the interior surfaces and shoot it off to get some paint!

But, watching the Aussie dollar slowly drop against the US over the last couple of weeks prompted me to get my arse into gear and purchase some suspension components from the states whilst the conversion rate is still reasonable! So today I ordered:

  • Ground Control weld on coilover sleeve kit
  • T3 Adjustable camber plates
  • T3 Rear traction brackets
All this thanks to Techno Toy Tuning(T3) in the US. There were plenty of other options around for these components but T3 worked out best value vs quality. Still to get suspension wise are the damper inserts. At this stage I'm thinking Koni 8611 race dampers, second choice being Tokico HTS102's. Here are some pics of the gear I purchased from the T3 website, just to give ya's something to look at!

Monday, August 11, 2008

Paint prep....

Melbourne sucks this time of year! Cold, wet and miserable. I like the heat - give me 30°C+ anyday! Seeing that my garage is full of my EH Holden, I'm having to build this car under my carport exposed to the elements! But, I sucked it up over the weekend and managed to make a start on the engine bay and interior paint prep. I hit all the bare metal areas that I welded up the last couple of weekends with the trusty U-POL etch primer, I also got half the cage coated before running out of primer. I also decided I better fix a few small rust spots before it gets painted - I then ran out of MIG gas -again!! I'm definitely heading down to BOC to enquire about hiring a bottle and reg. - these disposable things are a rip at $30 a pop, they dont last long at all!!

Having run out of gas and paint, on a sunday with nothing open, I decided to start rubbing back the painted surfaces on interior and engine bay. Next weekend, if I get both days to work on the car, I hope to have it ready for paint!
I didnt take any pics, nothing exciting to look at really that hasnt been seen already!


Monday, August 4, 2008

More front end stiffening

Spent the weekend finishing off the seam welding. I also added a couple of strengthening gussets between the firewall and the shock towers(see pics) using some metal I had lying around(this is "HalfArsed" Racing remember!). These should help with some strengthening of the front end as my cage does not extend forward to the shock towers.

A couple of things I've found whilst doing this job:
1. trying to weld a join with seam se
aler or paint in it sucks! I cleaned as much of the seam sealer out that I could using a fine screw driver tip to scrape it out, and also going over them with a wire wheel attachment to my 100mm angle grinder. It was virtually impossible to get it all.
2. My little 150amp hobby MIG is probably not the best unit for the job. Dont get me wrong its capable of doing a decent job -
just fiddly to get the settings right using the 3 rocker switches, and the little disposable canister of sheilding gas does not last very long at all. I went through 3 canisters @ ~$30 a pop! I perservered and managed an acceptable job of it I think - but I dont think I'll win any beauty contests with my welding!

Next I have to hit all the exposed bare metal surfaces in the engine bay and interior(ie. cage) with etch primer and then sand back the painted surfaces in prep for getting the interior and engine bay painted.

Monday, July 28, 2008

Seam Welding

Started seam welding the front end over the weekend, got about half way through before I ran out of gas.

Note To Self: check regularly that there is gas coming out of the MIG hand piece! I was wondering why my welds started getting a bit crappy!?

Also some pics of the cage anchoring points(pics were taken "before" I attacked all the joins with a wire wheel to get them ready for paint.)

Wednesday, July 23, 2008

Caged! And some mail!

Cage is done! I picked the car up this morning before work from FabRAIcations. I'm very happy with it! With the double side intrusion bars and the deep bucket Cobra seat I'm going to need a quick release steering wheel kit to make it easier to get in and out of! Will take some more pics later when I get a chance and post back.

Also received some parts in the mail which I ordered last week, a pair of Cusco 35mm RCA's(2nd hand) and some braided brake lines.


Wednesday, July 16, 2008

Some ROP Progress

Got a call from Rai today to ask if I could pop in and check the seat positioning before finalising it. Managed to take a few pics of the progress so far. Hoping it will be ready by the end of the week! Because the seat is so big around the shoulder/head area, he couldnt fit a triangulation bar between the main hoop and the roof side bars - so instead he's done a diagonal in the roof. The side intrusion bars will have an extra upper bar which is not pictured here - its going to make a little more difficult to get in and out of but is still a good idea for extra rigidity and safety.

The rear legs are also still to be done.

Thursday, July 10, 2008

What Rai? Delay?

Popped up to FabRAIcations at lunch time to see Rai and check how my cage was going - was expecting it to be almost done, but as you can see, not quite! Apparently his lead fabricator has been off sick for the last week with pneumonia! So it will be at least another week before its ready.


Rai does some great work from checking out the other cars he had there, I'm sure I'll be very happy with the result when its done. A great bloke too. There are couple of things he does which I really like, the extra triangulation bars at the top of the uprights are a nice touch. I'm also getting double side intrusion bars - the AE86 has a very large door
gap so I figured extra strength here wouldn't go astray! I'll also be cutting the side intrusion panels out of the ADM AE86 doors to lighten them so am happy to have the extra side protection. Heres some pics of a KE70 he's building up as a rally car for himself, my cage will be similar I think but without the X section in the roof!


I have already arranged to get the interior/cage and engine bay painted, mates rates through a friend, when its ready. I like white on race cars! I especially like the Subaru white from my GC8 WRX, its a real clean stark white so will use that color I think. I'll seam weld the engine bay once I get it back and shoot it off for paint once thats all done. I'm not going to worry about the exterior just yet.

Wednesday, July 9, 2008

Some random parts pics

The car is currently at FabRAIcations getting a 6 point cage installed, should be back home later this week I hope! In the meantime here are a few random parts photos.

Surge tank and dual Bosch motorsport fuel pumps, 4.6 diff gear and my bumpers with a fresh coat of black bumper paint an a fibreglass lip installed.


Tuesday, July 8, 2008

Somewhere to park my half-arse!

Scored a pretty serious seat from a mate in the WRX club, he used to run this in his track WRX before he got rid of the car and this has been sitting in his shed since. Looks like it might just fit!? I'll need a grab handle to get out of it!

Rail repair

Remember earlier when I sourced this shell, I mentioned it has some chassis rail damage as well? Not any more!

N2 Fatness!

Scored a set of TRD N2 flares(well good quality copies)! Always wanted to go N2 widebody but wasnt the plan to start with. I had to grab these though as they were too cheap to pass up! Unfortunately the budget wont stretch for a set of wheels & tyres to suit. I also need the front lip which I know of a couple of sources to get it from. But for the meantime I'll just have to settle for a quick mock up to see how they look before stashing them away for another day!


The DIFFerence

The original plan based on a tight budget, was to use the ADM "S series" diff with the drum rear brakes. Weld the centre locked and try and make the axles last at least the first race meet! One of my mates from AE86DC happened to have a JDM "Kouki" diff he was getting rid of, complete with TRD 2 way LSD centre and JDM rear discs and calipers. I couldnt resist and snapped it up. It was a bit leaky when I got it so I pulled it apart to inspect it and reseal the diff housing before bolting it up to the shell. Here you can also see the AJPS 6kg springs and AGX Excel G shocks in the rear. Also some Whiteline goodies(adjustable lateral rod and sway bar).


No rego = car trailer!

I got sick of having to hire a car trailer every time I had to take the car somewhere to get work done. Even if it was just a quick trip a couple of kms up the road to a workshop or something, the hire places only hired out for min of 24 hrs! So I would have to pay for a whole day for a 10min trip and then again to collect the car to bring it home when the work was finished. I decided to bite the bullet and buy a trailer - it would be needed to get the car to race meets anyhow when its ready.

Flares... now the rear!

The fronts guards turned out so well I decided to give the rears a go. The rears require a little more effort, the inner guard has to be first seperated from the outer guard and cut away a little to provide some room. Then after the flaring is done you need to re-attach(weld) the inner to the outer to provide adequate strength to the guard and stop crap being flicked up into the rear quarter cavity. I drilled the spot welds out, in hindsight I probably should have ground them through to prevent the holes in the lip you see in the pics. It wasnt a big deal in the end because I folded the lip back over to pretty much cover the holes. I also ran a bead of sikaflex along the join where I welded the inner guard to the outer to make sure it was a water tight seal. Once again I was pretty happy with the result!

Flares

Fitting decent sized wheels and tyres means modifying the stock guards. I had seen a few AE86's with hand flared guards which came out looking pretty good, so I decided to give it a go myself and hopefully I could enough clearance to fit the wheels and tyres I had. I started with the front guards as these were the easiest to do and if I stuffed it up all I had to do was source a new guard or buy aftermarket frp guards already flared. I purchased a cheap dodgy hammer and dolly set from Auobarn and set about pounding out the flare. I was suprised with how well they came out! I havent even used any filler on them yet.