Wednesday, April 29, 2009

Oh for an empty shed!?

Well Melbourne winter is starting to hit - which makes working on the car in the evenings after work awfully uncomfortable under the carport, and pretty much impossible if its raining & windy! I'm now starting to curse the fact that my shed is full to the brim with my half assembled(or dis-assembled, which ever way you want to look at it!) EH Holden!

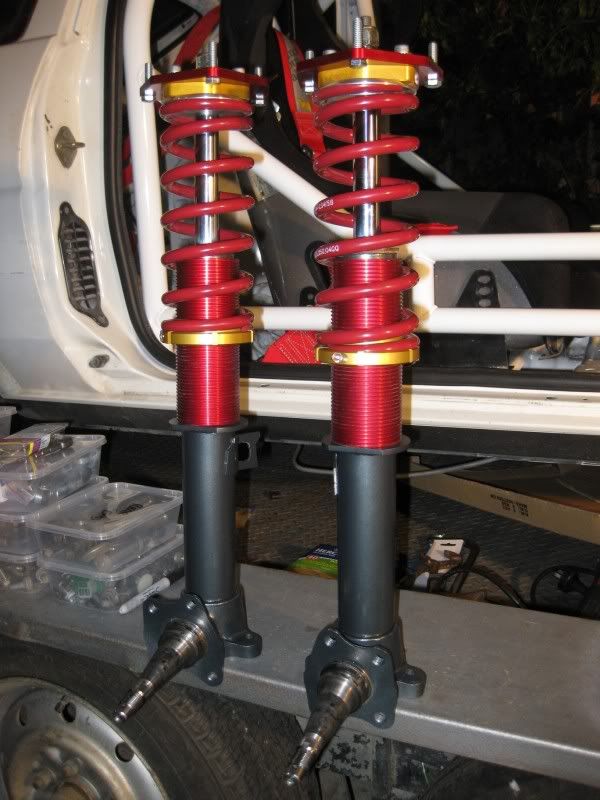
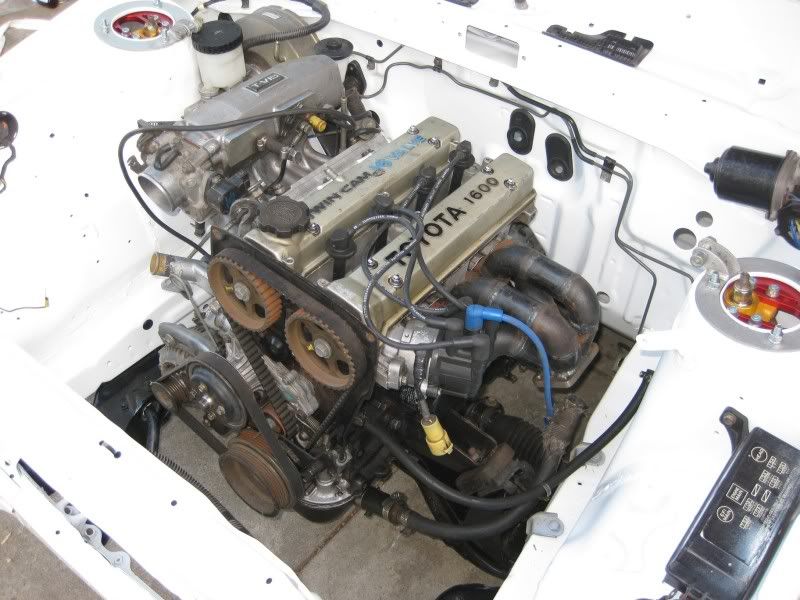
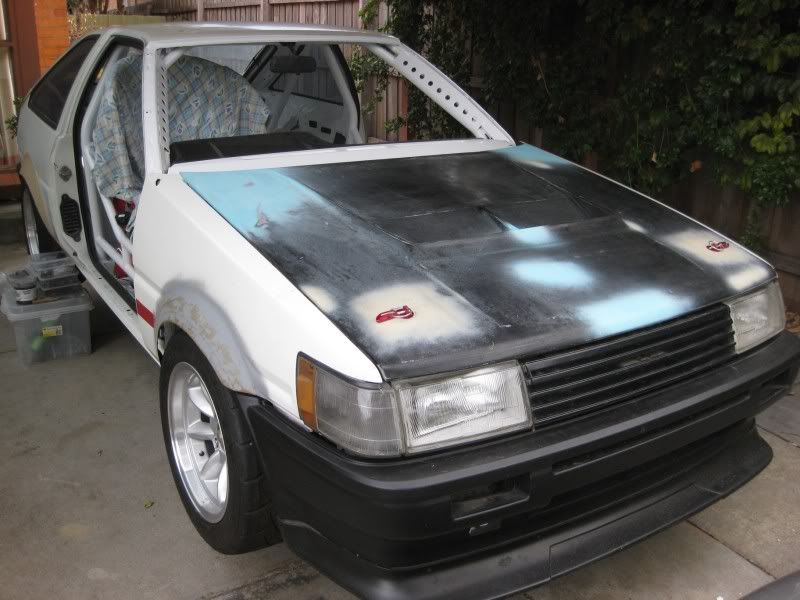
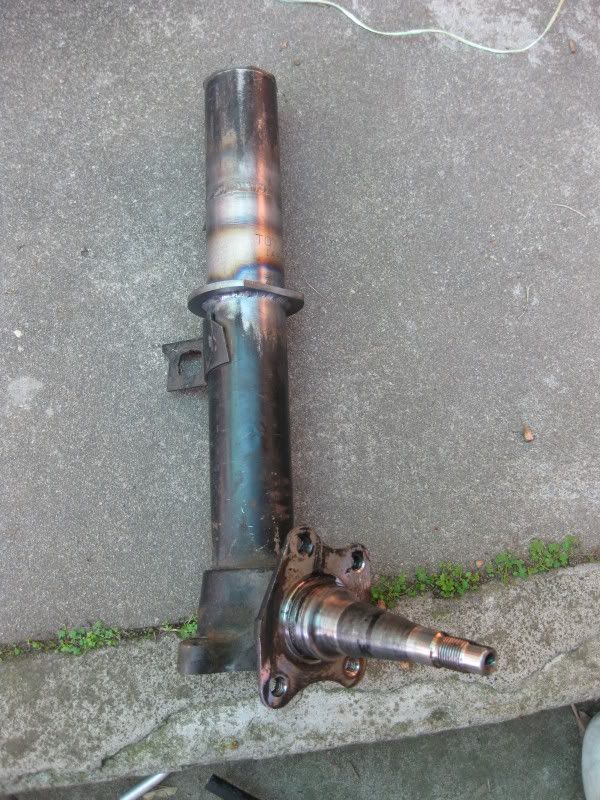
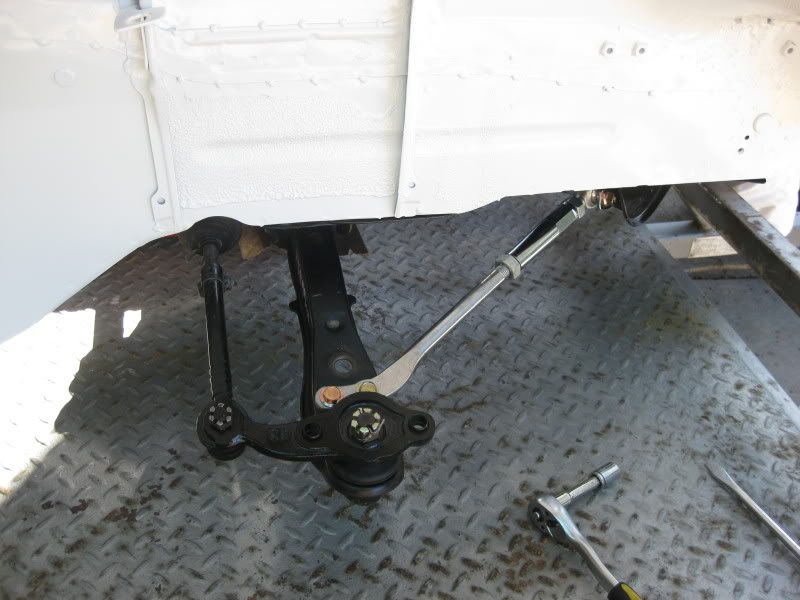
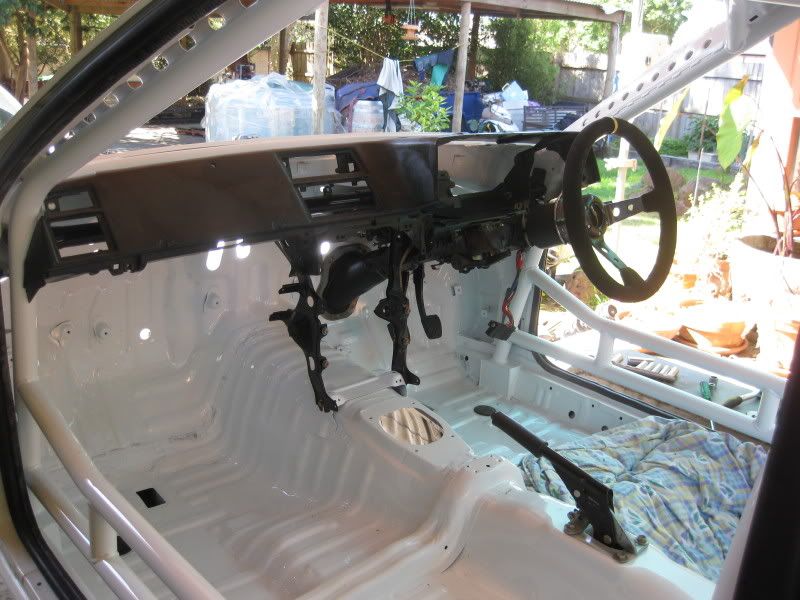
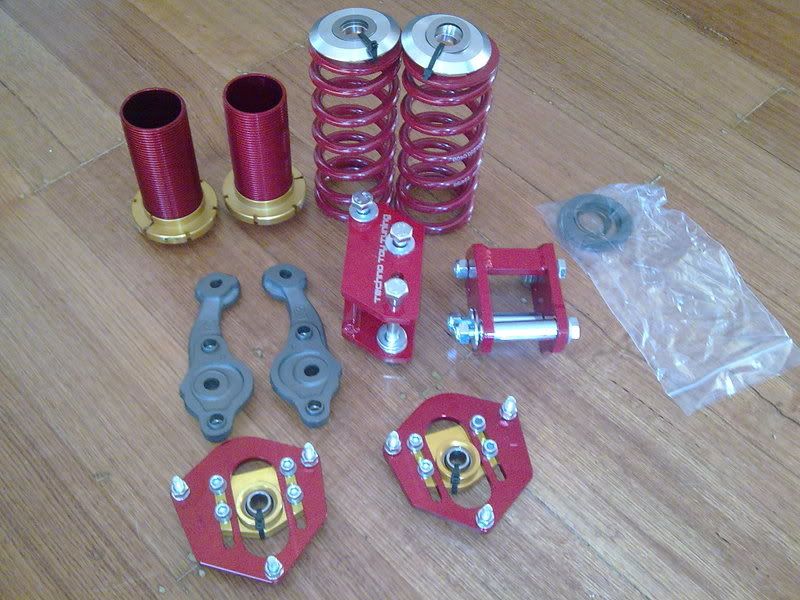
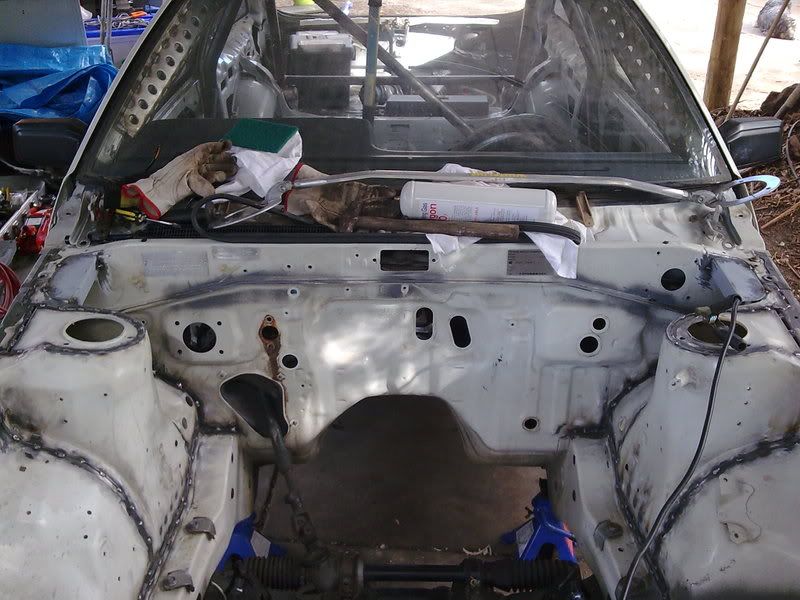
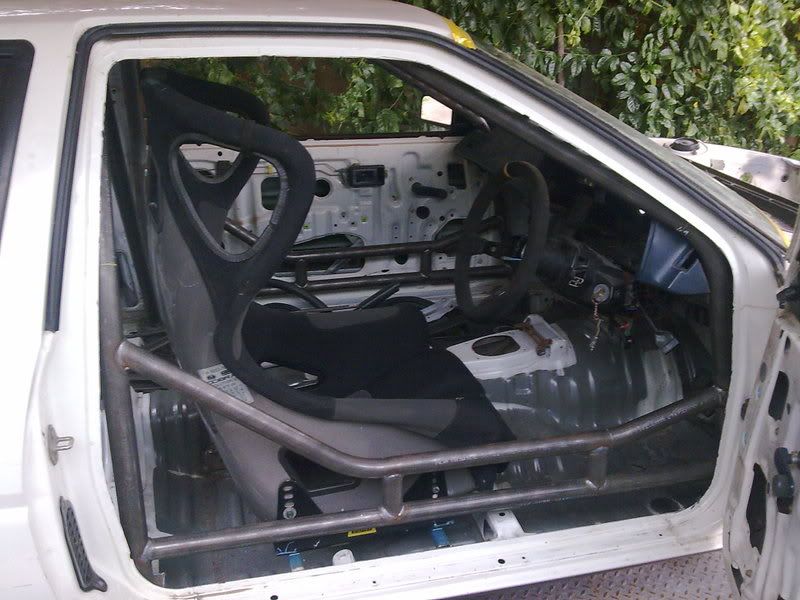
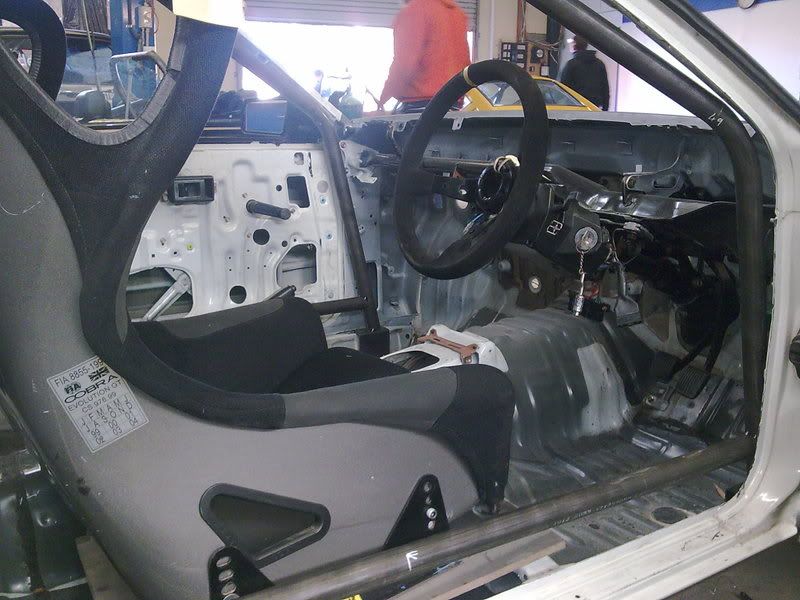
But progress is still happening! Namely the front suspension is complete(custom coilovers look very sexy!) and engine has now finally taken its rightful position back in the front of the car! It will be coming out again soon enough though as I plan to fit some new seals, timing belt, tensioner pulley etc. before its fired up. But for the moment I need to identify any issues with the electricals, fuel system, induction plumbing, turbo positioning etc.

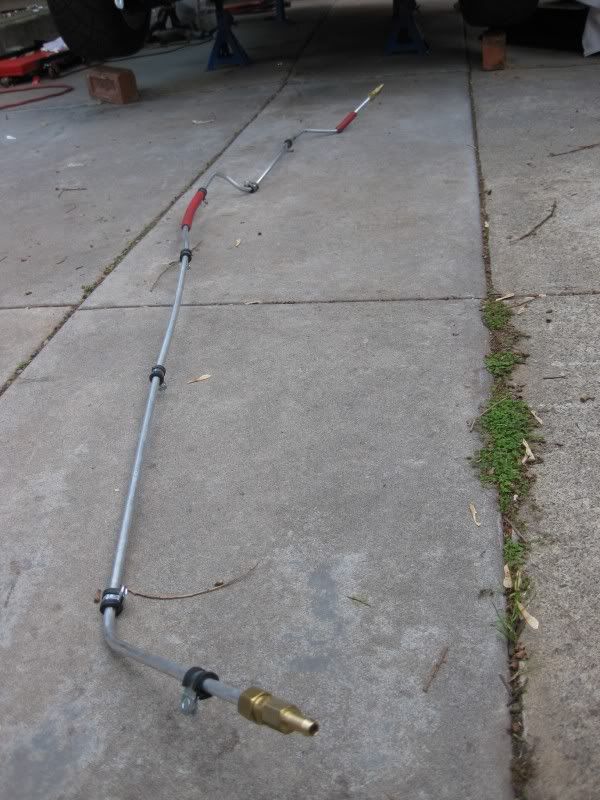
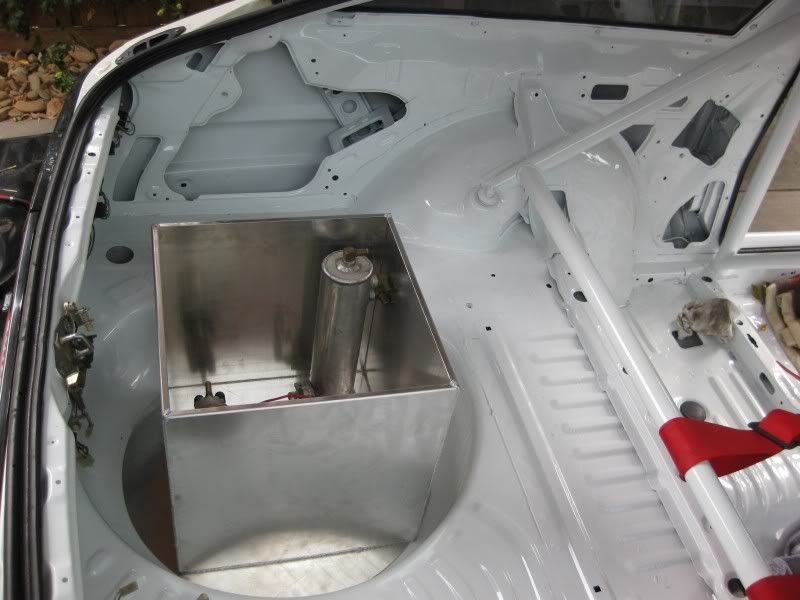
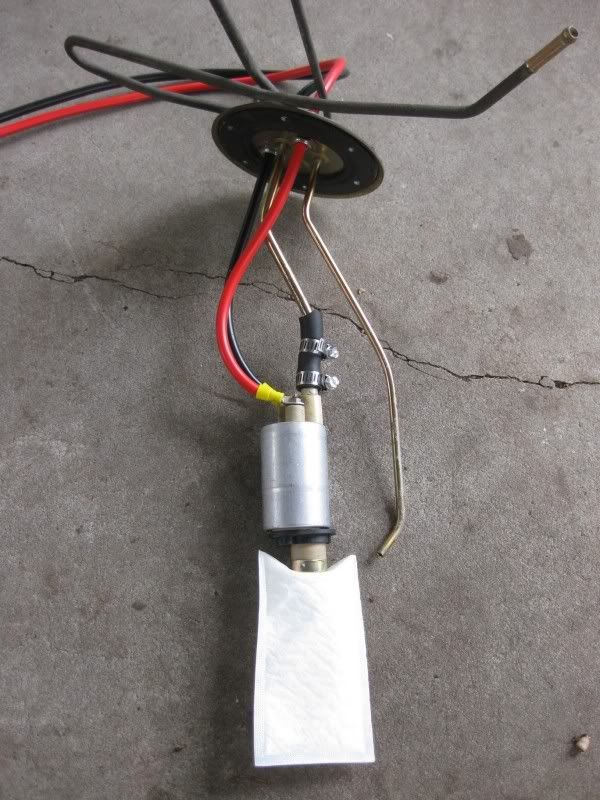
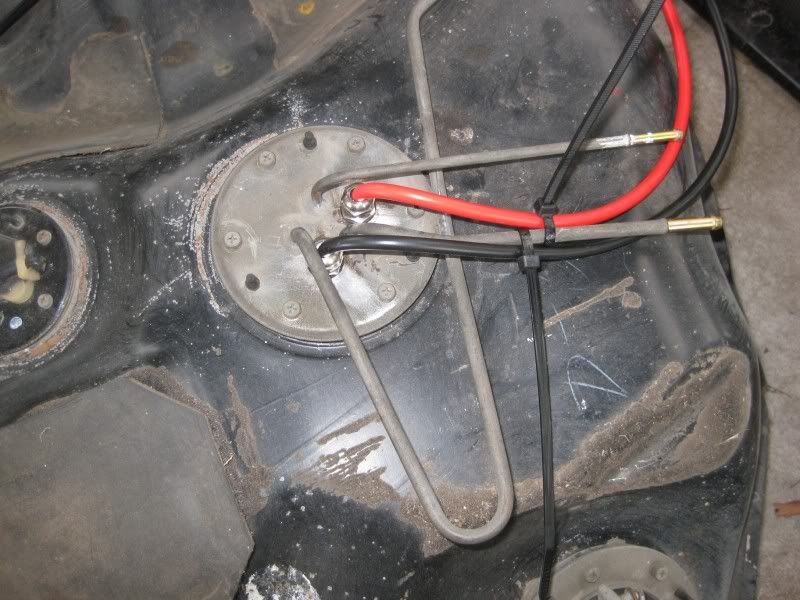
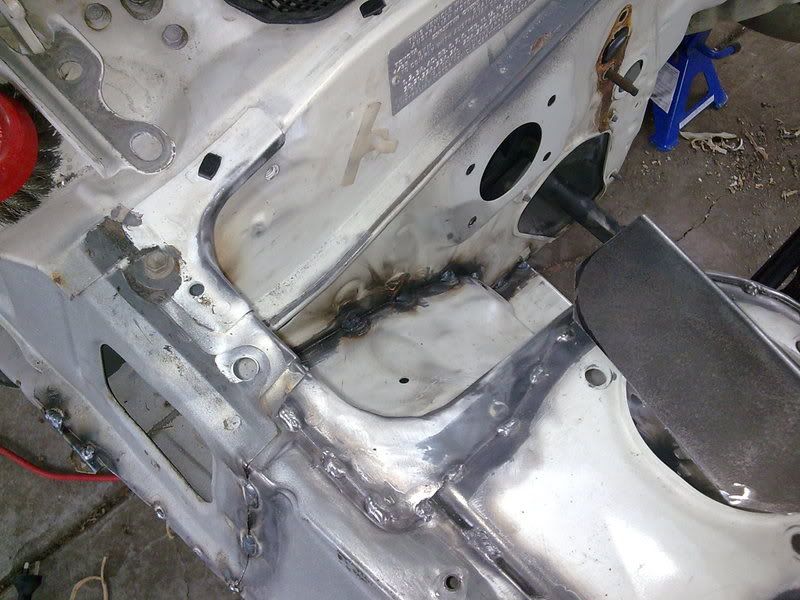
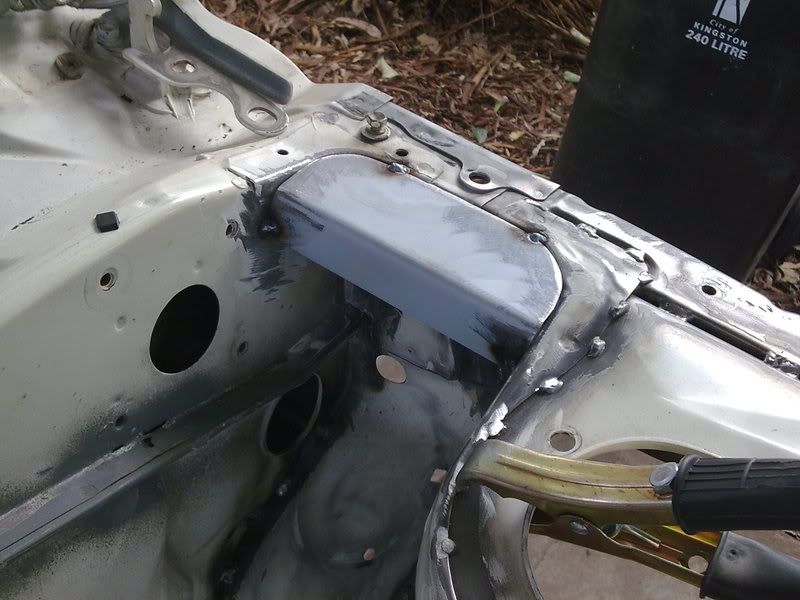
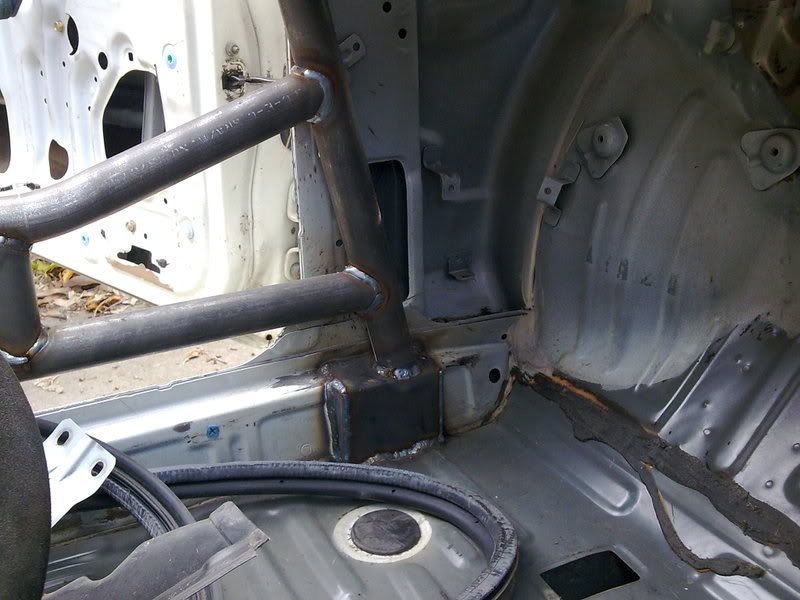
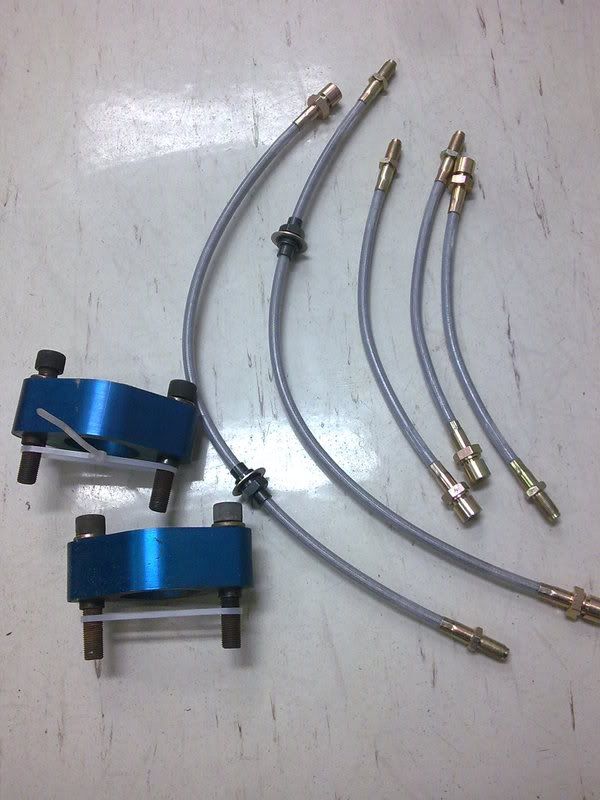
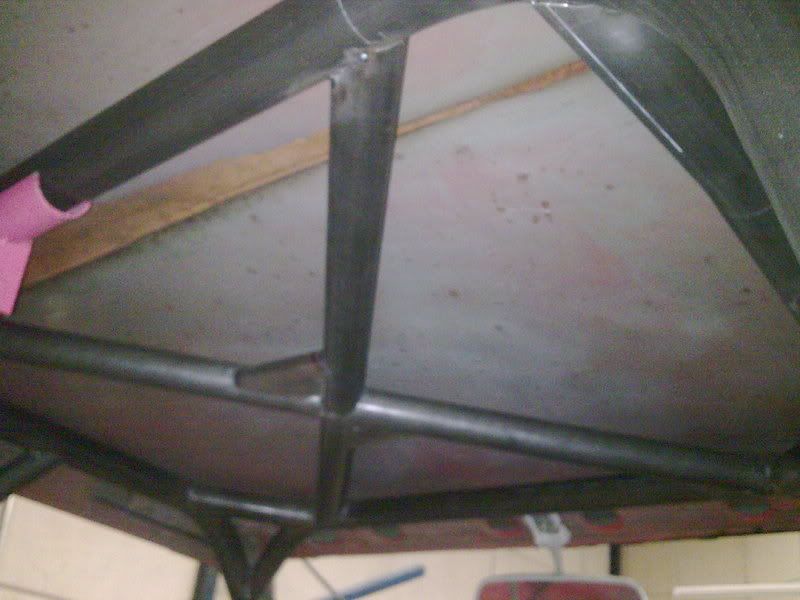
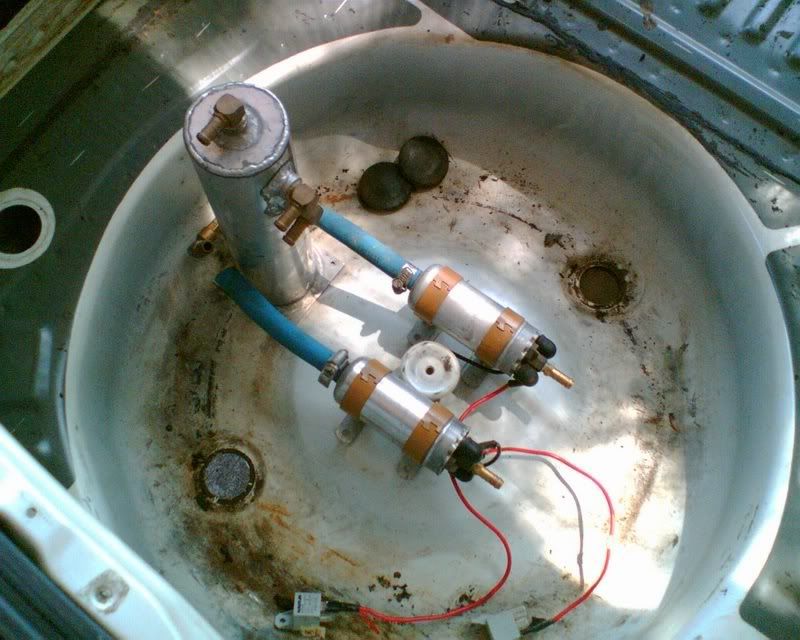
The fuel system is pretty much complete - I had Antony from Outlaw Welding fab up an alloy box to sit in the spare wheel well so I can seal off the surge tank, EFI filter, high pressure EFI pump and associated fittings from the cabin as per CAMS regulations - I think it turned out prett
y well. I just need to make up a ploycarbonate lid for it. I've secured the new alloy 10mm fuel feed line under the car and have sourced all the remaining fittings to connect everything up which will be done this weekend hopefully! I was planning on fitting a Malpassi rising rate fuel regulator to the system, which I had lying around, in place of the OEM reg but after speaking to a few knowledgable people about it have decided to retain the OEM fuel reg and the OEM pulsation damper. They seem to be capable of the job for the moment and should prevent any tuning issues due to fuel pressure fluctuations which can result from changing things around. I also had a 3/8 barb fitting welded to the fuel rail entry point in place of the old 5/16 fitting though so the fuel feed is a constant 3/8"(or 10mm) from the pump to the fuel rail. I'm using the old feed line for the return line which is only 1/4", as is the actual fuel tank feed and return. I'm using 5/16 hose for all the connections between the old 1/4" pipes and for the surge tank overflow and feed lines. I'm hoping the 1/4" pipes arent going cause any restrictions? Apparently other people who have done 4AGTE conversions have gotten away with it so lets hope.

I think the next step will be to look at the electrics(not looking forward to that!), then pull the engine back out to to fit the new seals/belts and the clutch and flywheel, then it will be getting close to fire up time!

Tuesday, April 14, 2009

Hooray for Easter break!

4 days off work for Easter - just what I needed to make some decent progress on the car! If only the auto parts places were open the whole 4 days I could have made a lot more! I tracked down someone to cut and shut my front struts for the coilover conversion. Antony from Outlaw Welding - cant thank him enough! Great bloke, I dropped the struts off to him on saturday lunch time and he had them ready for me sunday morning! I also have him fabricating an alloy box to house the EFI support system(surge tank, pump etc.). I attempted to start routing the new 3/8 fuel hardline - I discovered was that 3/8 bundy tube sucks arse at trying to get anything close to tight radius bend even using a pipe bender - it kept wanting to kink! Whilst I was at Bunnings grabbing some other bits and pieces I noticed some 3m lengths of thick walled 10mm aluminium tubing - so decided to give this a go instead - it was much better to work with and I managed with some patience to get it routed along the rail from the diff to the firewall. Problem now is the 3/8 pipe flaring tool I have does not quite fit the 10mm alloy tube(3/8inch is not quite the same as 10mm). Should have the coilovers completed by the end of the week which means I can bolt the front end together properly(with the front wheels on) and drop the car off the trailer to install the engine!

Monday, April 6, 2009

Fueling around...

Seeing the original car came supplied with a low pressure carby fed engine - I needed to upgrade the fuel system to high performance EFI spec. My options were to either find and buy a JDM spec fuel tank with an in tank EFI pump or adapt the tank I had - seeing already had an intank EFI pump lying around I decided to adapt the tank I had. I went a bit overboard with the pump wiring, using 8 gauge(when cutting a length off the reel at Jaycar I accidently snipped the wrong gauge - so decided to just got with it!) but the thicker wire did fit the wire glands better which I used to seal the tank where the wires enter. I wi ll use the same guage wire to connect the external pump as well. Should have plenty of voltage to the pumps!

Monday, March 30, 2009

Long time coming update!

Well leading up to Xmas not much happened unfortunately - I couldn't get the car to the painters coz my car trailer was missing in action, and then after Xmas I was on holiday in Europe for a month. But I pulled my finger out over the last month and got the car off to the painters - many thanks to Nick at Exotic Kustoms, I dropped it off there on Thursday night and he rang to tell me it was ready on friday arvo! I had it back home by Saturday lunch time ready to start re-assembly! Just the interior/engine bay painted for the moment as I havent completely finished the exterior body work. I can do that after its running!

I also sorted the out the LCA bushing issue. Next on the "to do" list is get my front strut coilover conversion done. Power steering arms and rose jointed adjustable castor rods are installed and looking good!


Thursday, September 25, 2008

You've got mail!

Well things have been a bit slow this month - my car trailer is currently being utilised for another purpose and so I havent been able to get my car to the paint shop for engine bay and interior paint. I'm hoping to have it back soon. I'm hanging to get this thing painted so I can start re-assembly! In the meantime my T3 gear arrived today after a bit of a wait, all looks good though! The T3 traction brackets are certainly a hefty bit of gear! I think they may be a little over-engineered, but I'd rather them be bullet proof I suppose then flimsy and prone to breaking or deforming! Downside is the extra weight. You'll also notice a set of power steering arms which I came across on eBay in the states for a lot cheaper than they are available here.

Also today I managed to grab a new lightweight FRP bonnet to replace the heavy OEM one. I wasnt planning on buying one so soon but this one popped up and I was too tempted to not buy it! I think its an authentic Origin bonnet as it appears to be foam filled sandwhich FRP of decent quality and the guy I bought it off also gave me a groovy looking set of bonnet pics that sit flush and lock with a key(cheers
86Powers)! Its 2nd hand and has some slight damage(broken corner) but easily fixed and the price was right! Most importantly its feather light compared to the lead filled OEM one!

Saturday, September 13, 2008

hmmmm oops...


This is not how to fit a new prothane bushing to a lower control arm. If your not already aware the steel sleeve surrounding the old rubber bushing is supposed to stay in the LCA. I gave these to a mechanic buddy of mine to press out and in, thinking he would at least read the instructions first. Oh well, he wasnt charging me so I cant get too angry with him! A few people have contacted me saying they have spares lying around I can have so into the bin with this one and try again...

Thursday, August 21, 2008

Suspension stuff

I was hesitant to add a new entry, seeing that I dont have any new interesting pics of the build to post up. I've basically spent what time I had to work on the car the last two weekends to continue prepping for paint. All welding is now done(I found some more welding to do last weekend), all bare metal surfaces coated in etch primer. I just have to rub back the interior surfaces and shoot it off to get some paint!

But, watching the Aussie dollar slowly drop against the US over the last couple of weeks prompted me to get my arse into gear and purchase some suspension components from the states whilst the conversion rate is still reasonable! So today I ordered:

  • Ground Control weld on coilover sleeve kit
  • T3 Adjustable camber plates
  • T3 Rear traction brackets
All this thanks to Techno Toy Tuning(T3) in the US. There were plenty of other options around for these components but T3 worked out best value vs quality. Still to get suspension wise are the damper inserts. At this stage I'm thinking Koni 8611 race dampers, second choice being Tokico HTS102's. Here are some pics of the gear I purchased from the T3 website, just to give ya's something to look at!

Monday, August 11, 2008

Paint prep....

Melbourne sucks this time of year! Cold, wet and miserable. I like the heat - give me 30°C+ anyday! Seeing that my garage is full of my EH Holden, I'm having to build this car under my carport exposed to the elements! But, I sucked it up over the weekend and managed to make a start on the engine bay and interior paint prep. I hit all the bare metal areas that I welded up the last couple of weekends with the trusty U-POL etch primer, I also got half the cage coated before running out of primer. I also decided I better fix a few small rust spots before it gets painted - I then ran out of MIG gas -again!! I'm definitely heading down to BOC to enquire about hiring a bottle and reg. - these disposable things are a rip at $30 a pop, they dont last long at all!!

Having run out of gas and paint, on a sunday with nothing open, I decided to start rubbing back the painted surfaces on interior and engine bay. Next weekend, if I get both days to work on the car, I hope to have it ready for paint!
I didnt take any pics, nothing exciting to look at really that hasnt been seen already!


Monday, August 4, 2008

More front end stiffening

Spent the weekend finishing off the seam welding. I also added a couple of strengthening gussets between the firewall and the shock towers(see pics) using some metal I had lying around(this is "HalfArsed" Racing remember!). These should help with some strengthening of the front end as my cage does not extend forward to the shock towers.

A couple of things I've found whilst doing this job:
1. trying to weld a join with seam se
aler or paint in it sucks! I cleaned as much of the seam sealer out that I could using a fine screw driver tip to scrape it out, and also going over them with a wire wheel attachment to my 100mm angle grinder. It was virtually impossible to get it all.
2. My little 150amp hobby MIG is probably not the best unit for the job. Dont get me wrong its capable of doing a decent job -
just fiddly to get the settings right using the 3 rocker switches, and the little disposable canister of sheilding gas does not last very long at all. I went through 3 canisters @ ~$30 a pop! I perservered and managed an acceptable job of it I think - but I dont think I'll win any beauty contests with my welding!

Next I have to hit all the exposed bare metal surfaces in the engine bay and interior(ie. cage) with etch primer and then sand back the painted surfaces in prep for getting the interior and engine bay painted.

Monday, July 28, 2008

Seam Welding

Started seam welding the front end over the weekend, got about half way through before I ran out of gas.

Note To Self: check regularly that there is gas coming out of the MIG hand piece! I was wondering why my welds started getting a bit crappy!?

Also some pics of the cage anchoring points(pics were taken "before" I attacked all the joins with a wire wheel to get them ready for paint.)

Wednesday, July 23, 2008

Caged! And some mail!

Cage is done! I picked the car up this morning before work from FabRAIcations. I'm very happy with it! With the double side intrusion bars and the deep bucket Cobra seat I'm going to need a quick release steering wheel kit to make it easier to get in and out of! Will take some more pics later when I get a chance and post back.

Also received some parts in the mail which I ordered last week, a pair of Cusco 35mm RCA's(2nd hand) and some braided brake lines.


Wednesday, July 16, 2008

Some ROP Progress

Got a call from Rai today to ask if I could pop in and check the seat positioning before finalising it. Managed to take a few pics of the progress so far. Hoping it will be ready by the end of the week! Because the seat is so big around the shoulder/head area, he couldnt fit a triangulation bar between the main hoop and the roof side bars - so instead he's done a diagonal in the roof. The side intrusion bars will have an extra upper bar which is not pictured here - its going to make a little more difficult to get in and out of but is still a good idea for extra rigidity and safety.

The rear legs are also still to be done.

Thursday, July 10, 2008

What Rai? Delay?

Popped up to FabRAIcations at lunch time to see Rai and check how my cage was going - was expecting it to be almost done, but as you can see, not quite! Apparently his lead fabricator has been off sick for the last week with pneumonia! So it will be at least another week before its ready.


Rai does some great work from checking out the other cars he had there, I'm sure I'll be very happy with the result when its done. A great bloke too. There are couple of things he does which I really like, the extra triangulation bars at the top of the uprights are a nice touch. I'm also getting double side intrusion bars - the AE86 has a very large door
gap so I figured extra strength here wouldn't go astray! I'll also be cutting the side intrusion panels out of the ADM AE86 doors to lighten them so am happy to have the extra side protection. Heres some pics of a KE70 he's building up as a rally car for himself, my cage will be similar I think but without the X section in the roof!


I have already arranged to get the interior/cage and engine bay painted, mates rates through a friend, when its ready. I like white on race cars! I especially like the Subaru white from my GC8 WRX, its a real clean stark white so will use that color I think. I'll seam weld the engine bay once I get it back and shoot it off for paint once thats all done. I'm not going to worry about the exterior just yet.

Wednesday, July 9, 2008

Some random parts pics

The car is currently at FabRAIcations getting a 6 point cage installed, should be back home later this week I hope! In the meantime here are a few random parts photos.

Surge tank and dual Bosch motorsport fuel pumps, 4.6 diff gear and my bumpers with a fresh coat of black bumper paint an a fibreglass lip installed.


Tuesday, July 8, 2008

Somewhere to park my half-arse!

Scored a pretty serious seat from a mate in the WRX club, he used to run this in his track WRX before he got rid of the car and this has been sitting in his shed since. Looks like it might just fit!? I'll need a grab handle to get out of it!